02. Vulnerability Scanning Environment
Setting Up Your Project Environment
An Azure environment has been created for this project. You will need to step an Azure VM and use the image provided in the instructions below to complete the vulnerability scanning portion of this project.
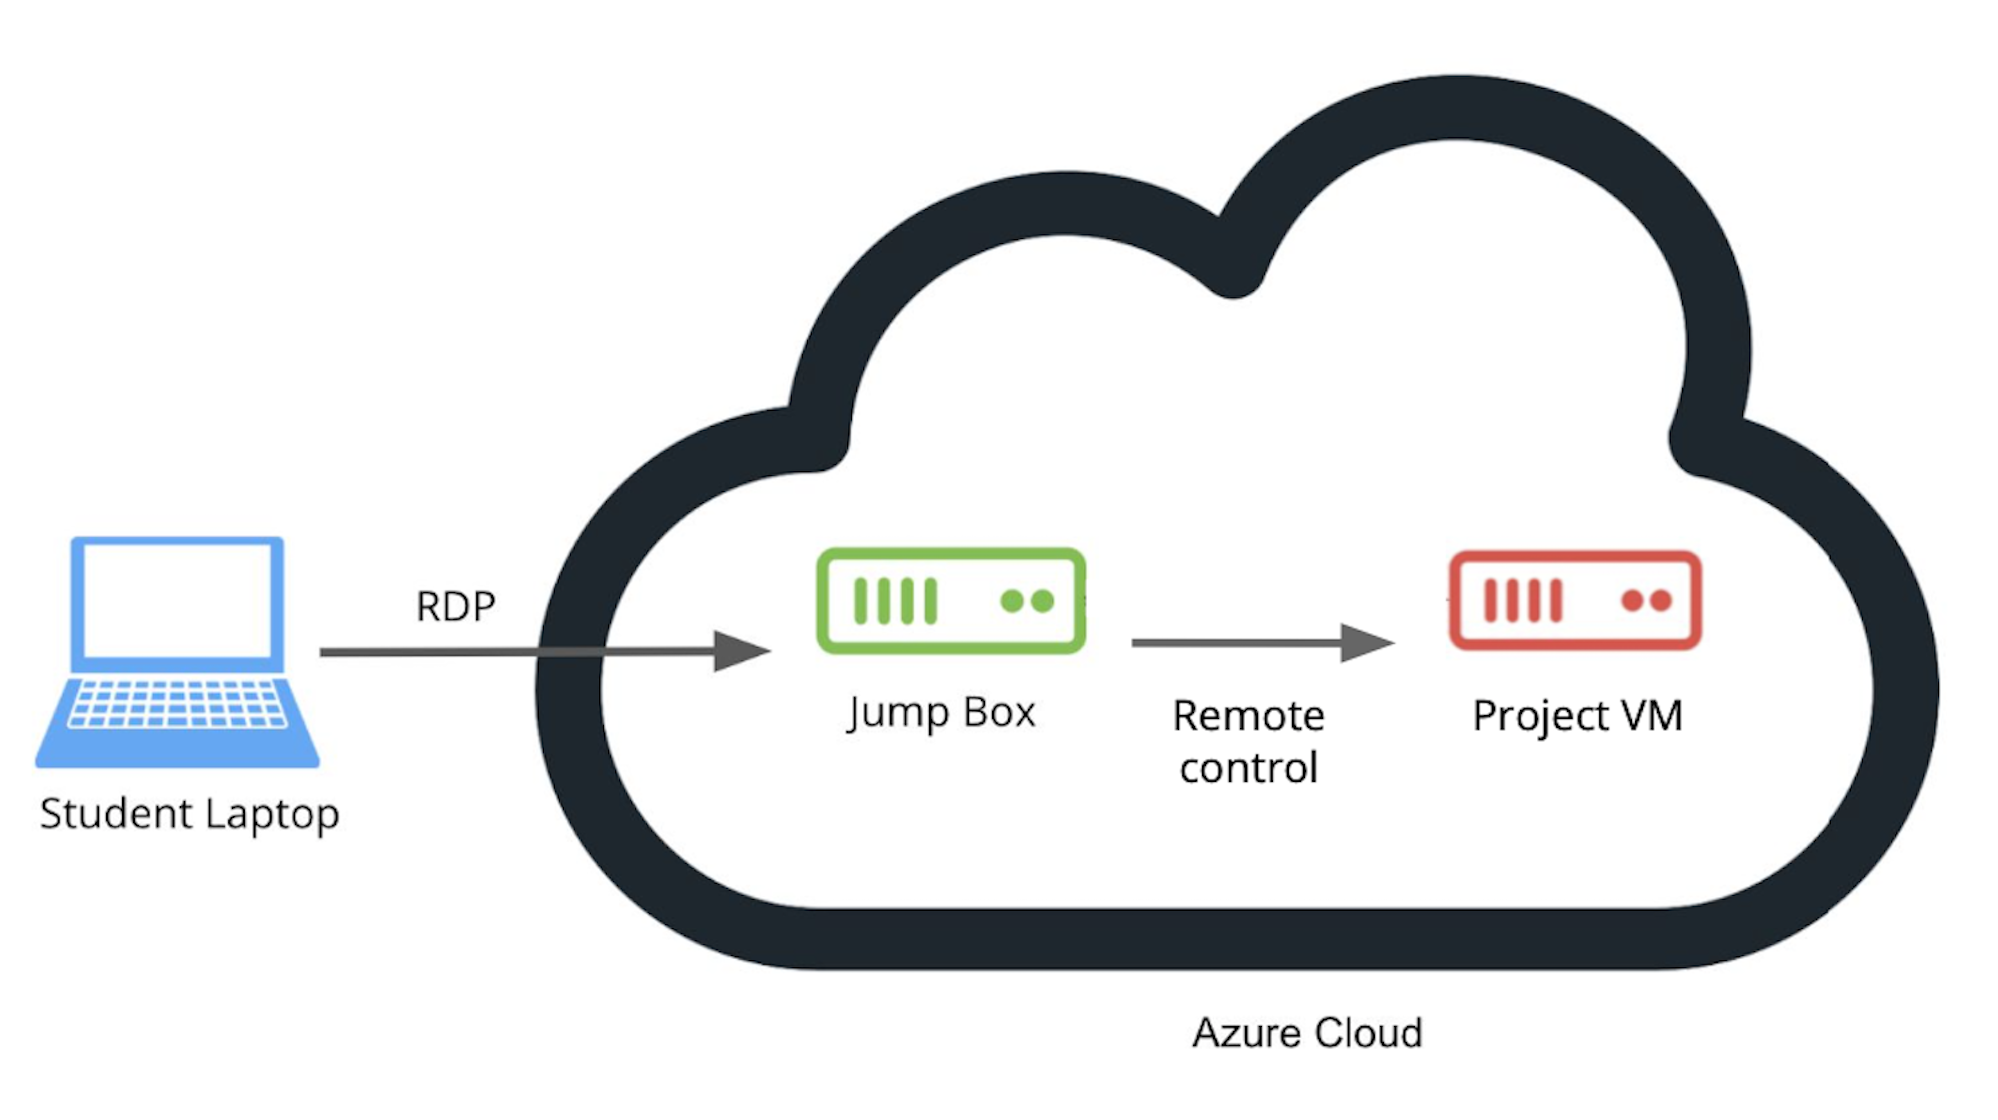
Set Up a Windows 10 PC Virtual Machine (VM) Workspace in Microsoft Azure
In this course, you will use virtual Windows PCs for some of the exercises and the project. You should have set this up in the first Course of the Nanodegree.
If you haven't, please make sure you do that before anything else. You will create your own virtual Windows 10 PC called the JumpBox in Azure cloud and connect (RDP) to it. This will be your workspace for this course and this entire Nanodegree. Then you will use the JumpBox VM to get remote control of other virtual Windows PCs.
IMPORTANT: Please always remember to shut down ALL of the virtual machines when not in use to avoid charges! The status of ALL virtual machines should be stopped!
Project Documents
Task Feedback:
Nice work!
Setup Student LAB VM Credentials
As referenced in Step 4 of the Setup Student LAB document, you'll need to use the following username and password.
Username: cyberadmin
Password: @UdacityLearning#1
Nessus Scanner Instructions
You need to use the Nessus Scanner on the VM to complete the project and not on your own machine.
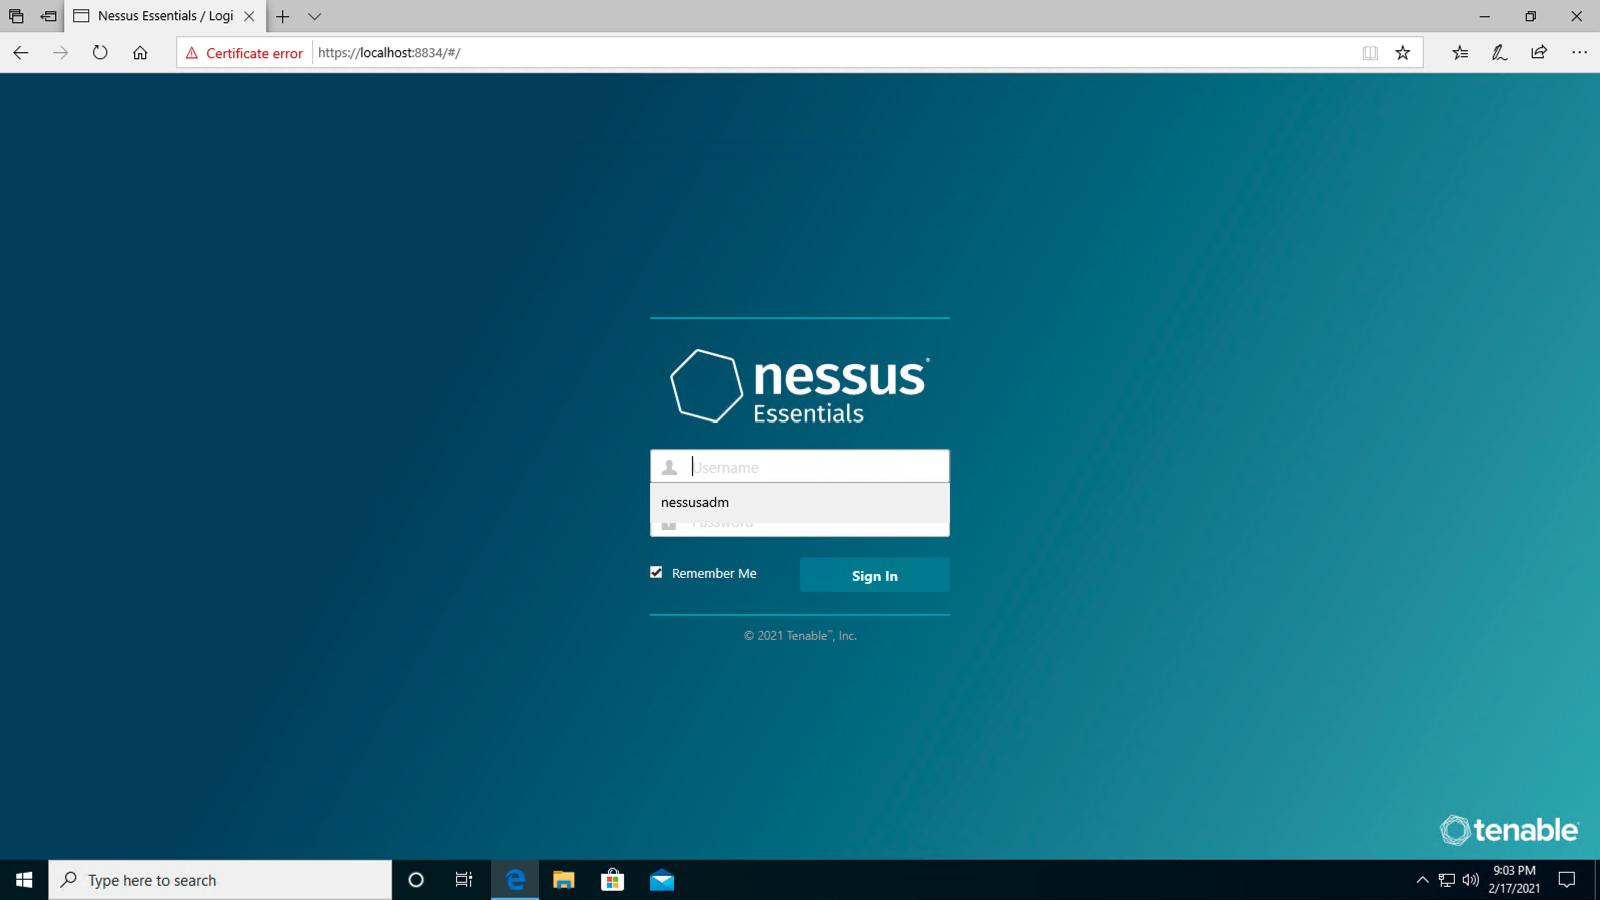
Pre-installed Nessus Credentials inside Setup Student LAB VM
Nessus is already pre-installed in Setup Student LAB VM and running in the background as you start the VM. To access Nessus web client, open Microsoft Edge browser and go to https://localhost:8834/
Note: you can ignore the SSL warning by clicking Details* and Go on to the website.*
Username: nessusadm
Password: password
*Note: If you use Microsoft Edge browser in the VM, the username and password are saved in password settings. On the Nessus web client homepage, click the username field and the username and password will be populated automatically. *
Nessus Web Client
(Optional) Installing and running Nessus on your local machine
Alternatively, you can install and run Nessus on your local machine. In order to download the Nessus scanner, you'll need to visit this site. You'll need to use Firefox to do this.
- Select the "Nessus-8.13.1-x64.msi" version of the Nessus scanner to download.
- Wait for the installer to prompt you and go through the installation wizard.
- A browser window will open, if it doesn't load, copy the URL and enter it into the Firefox browser.
- When Nessus is loaded, click the button to enter the site.
- It'll give you a warning window, select Advanced and allow the app to load.
- Nessus will initialize and load.
Create your Account and Activation Code
- Fill out the form with your first name, last name, and e-mail for your activation code
- Create your credentials
You should now have access to the Nessus Scanner to begin your first scan.